Building Shelves with Pallet Wood
What You’ll Need:
- 1 Pallet
- #6 x 1 – 5/8” Coarse Thread Screws
- #8 x 2 – 1/2” Drywall Screws
- Hammer
- Hand saw or Sawzall
- Drill bit
- Hook (optional)
- 120 Grit Sandpaper (optional)
- 1 can of Clear Gloss Polycrylic spray (optional)
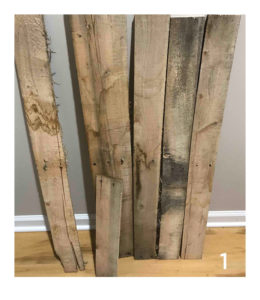
Step 1: Disassembling the Pallet
By far the quickest way I’ve seen to disassemble a pallet is by using a sawzall to cut through the nails holding it together. However, if you’re like me and don’t have a sawzall, you can use a hammer and a flat pry bar to take the pallet apart – just be careful not to split the boards. I’d suggest wearing gloves to prevent splinters (see photo #1).
Step 2: Cut and Sand the Boards
Now that you have the pieces needed for your shelf, you might want to saw off the ends of the boards to eliminate holes left from the nails. I wanted the pieces to be different sizes, so I wasn’t intentional about how much I sawed off of the ends. After this, I took some sandpaper (120 grit) to each of the boards to rid of any rough edges and to smooth out places that the boards had splintered a little.
Step 3: Apply Protective Finish
I still felt the boards needed a little something extra, as the boards (due to being old) had quite a few imperfections. That said, I used a can of Clear Gloss Polycrylic spray to give the boards a bit of a wet look to them. Follow the directions on the can and your boards will look a notch better in no time.
Step 4: Mark and Attach Braces
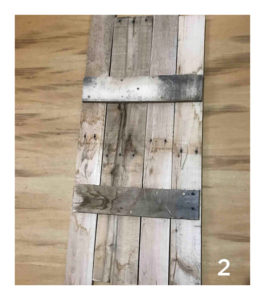
Once the boards are dry from the polycrylic spray, use a pencil to mark where you would like the shelves to be on the pallet wall. After marking, flip the boards over and attach the boards you are using as braces, making sure you attach them on the opposite side of where the shelves will be mounted (see photo #2). The braces are to keep the boards together, but also to give you more wood to drill into for your shelves. Make sure that the screws you use for the braces are not too long, otherwise they will go all the way through to the front of your pallet wall. For this, I used #6 x 1 – 5/8 inch screws.

Step 5: Attach Shelves
The only thing left to do is attaching your shelves. You’re likely going to need a drill bit to make room for your screws (the #8 x 2 – 1/2” Drywall Screws). Once you’ve made room with a drill bit, drive your screws in from the back side of the pallet wall and into the shelves on the other side (see photo #3). I used 3 screws for my long shelf and 2 screws for my shorter shelf. If you wanted floating shelves, your job is done! If you’re looking to hold a little bit of extra weight with your shelves, you’ll want to attach L brackets for reinforcement. I’d suggest using the thicker u-shaped boards (called the “runner” boards) from the pallet to make L brackets.
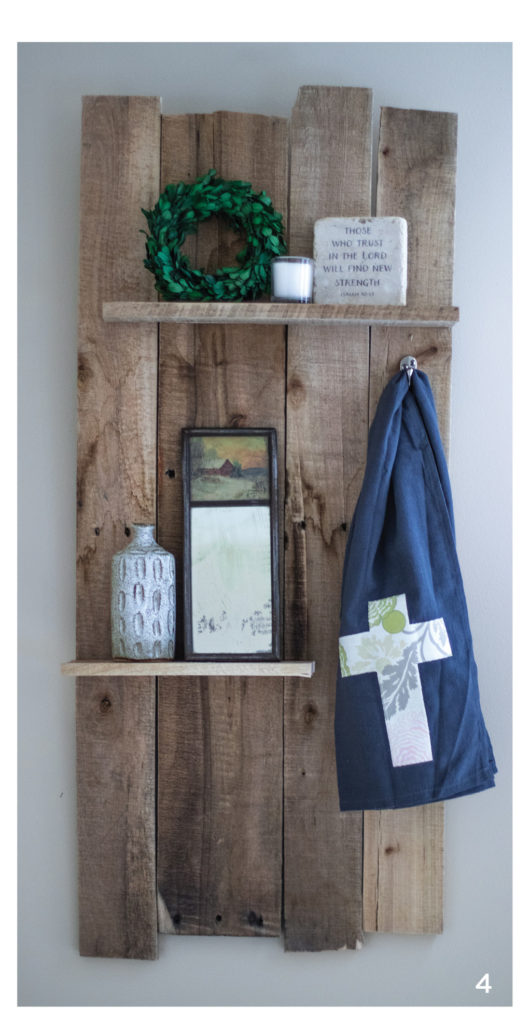
Bonus (Optional):
If you want your wall shelf to look a notch above the rest, find an old hook or buy one for a couple bucks at a local hardware store when you purchase the Polycrylic Spray. Attach the hook to the pallet wall and now you have a place to hang keys, a dog leash, or whatever else your heart desires (see photo #4).
By: Austin Essary